How to use TortoiseSVN
March 14th, 2014 by
Scott McNabTortoiseSVN is the easiest and most popular way to use Subversion under Windows operating systems. Getting started couldn’t be easier – this post provides step-by-step-instructions on how to connect to ProjectHut using TortoiseSVN and make your first commit.
Note: these instructions assume that you have already:
- Created a ProjectHut account
- Created a User using the ProjectHut Control Panel
- Created a SVN repository using the ProjectHut Control Panel
- Assigned access permissions to your SVN repository for your User
Once you have completed these steps, you can start using TortoiseSVN on your computer.
How to checkout out a SVN repository using TortoiseSVN
- First, start by downloading the TortoiseSVN client software and installing it on your computer.
- Login to the ProjectHut Control Panel (i.e. the admin/ area of your account).
- Locate the Subversion repository that you wish to connect to in the Subversion page.
- Right-click on the orange View Subversion Repository link button, and select
Copy link address to store the repository URL in the clipboard. 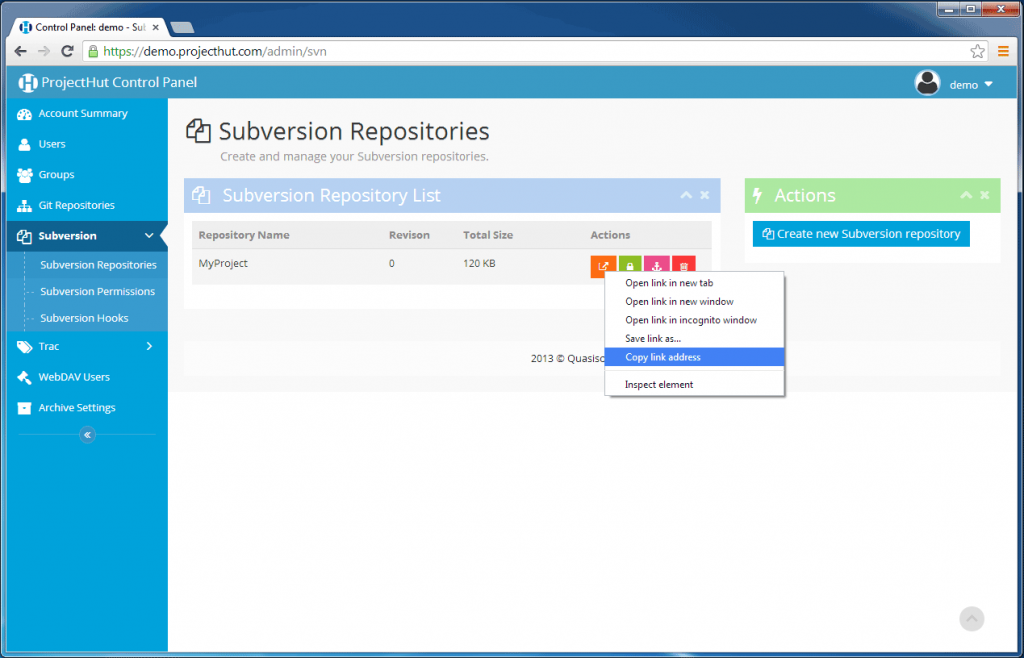
- In Windows explorer, locate the directory where you wish to checkout your repository. Right-click and select the
SVN Checkout... button. 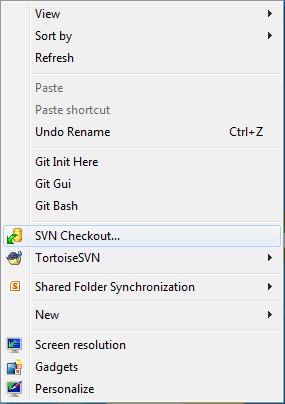
- The TortoiseSVN Checkout dialog will appear. Paste the SVN repository URL into the
URL of repository: field, specify the Checkout directory:, and click OK. 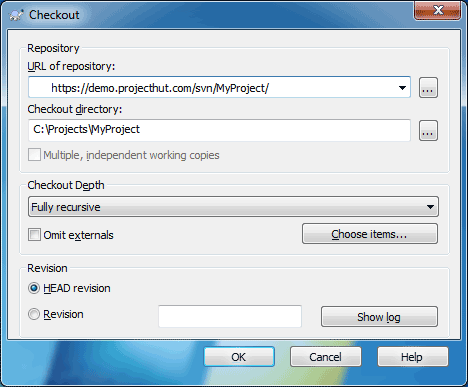
- If you have set your SVN Permissions to require authenticated access to your repository, a dialog will appear where you can enter the username and password of on of the repository Users. Make sure to select the
Save authentication checkbox to avoid having to re-enter the credentials each time you use TortoiseSVN. 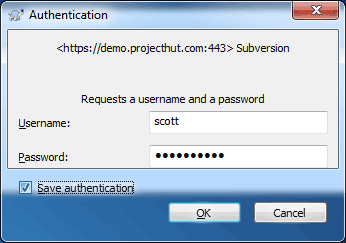
- Wait a few moments until the repository has finished checking out.
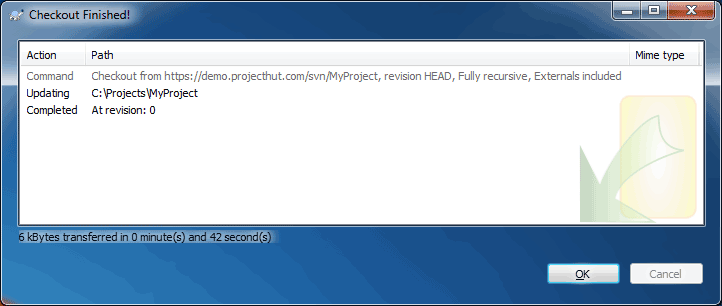
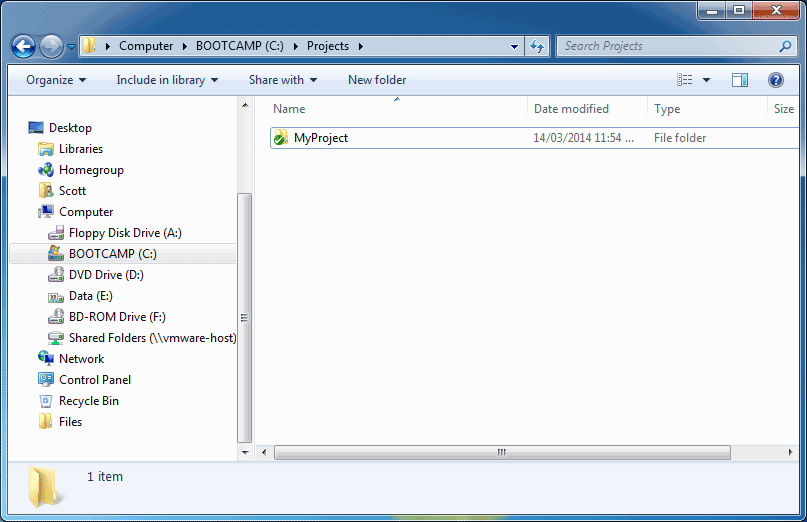
- Use Windows Explorer to navigate to the directory containing the checked-out project. You will notice that the folder icon contains a green check icon – this indicates that there are no uncommitted changes contained in this folder, or any other folder underneath.
How to add files using TortoiseSVN
Once you have checked out a local copy of your repository, you can start using it by adding files.
In this example, we will begin by creating three top-level directories that make up a typical SVN repository (trunk/, branches, and tags/). Read our FAQ article on How to structure a SVN repository for a description of why this is a good idea.
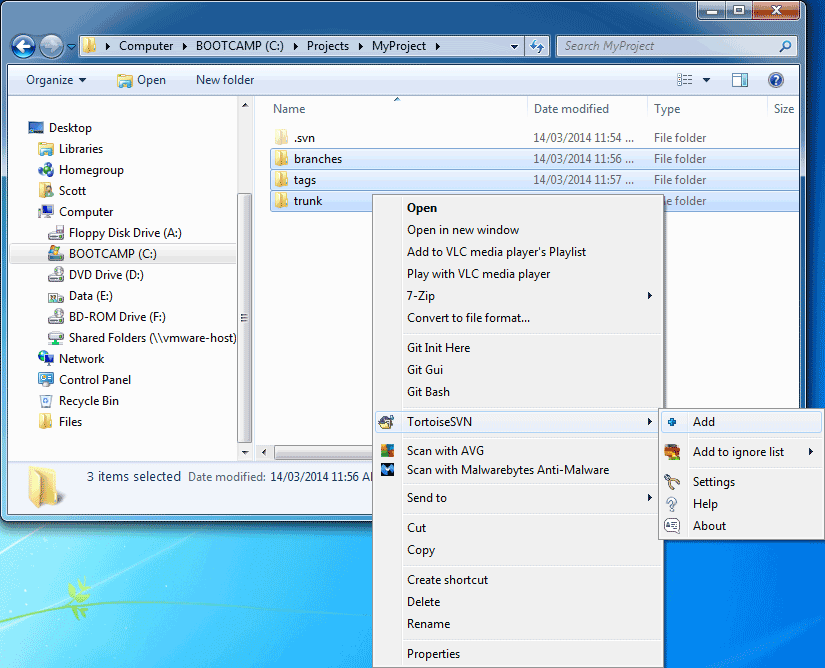
- Using Windows Explorer, double-click on the checked out repository.
- Create three new empty directories, titled:
branches, tags, trunk
- Highlight the three new directories, then right-click and select TortoiseSVN, then Add.
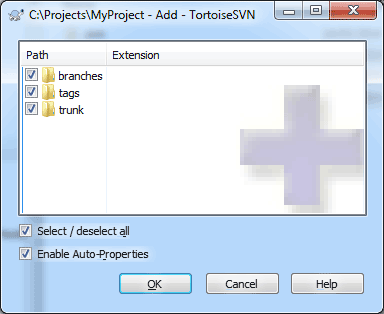
- The TortoiseSVN Add dialog will appear. Here you can use the checkboxes to select or unselect files that are to be added to the repository. Make sure all three directories are checked, then click OK.
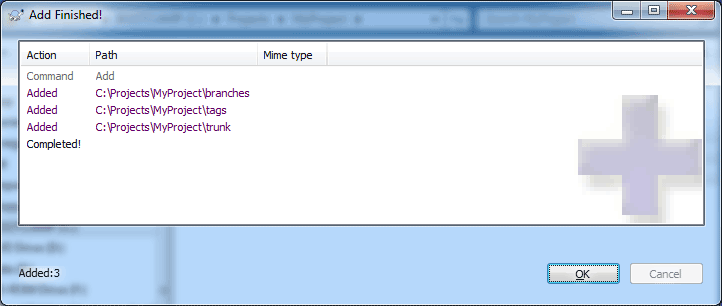
- A dialog will appear to confirm that the directories or files have been added to the local checked out repository.
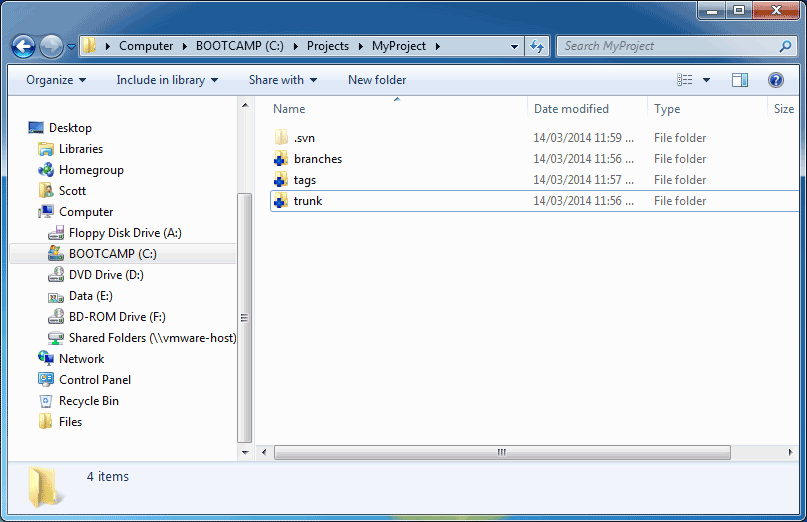
- Now if you look at the project directory in Windows Explorer, you will notice that the three added directories appear with a blue add symbol next to them. This indicates that the files have been added to the local repository, but have not yet been uploaded to the server.
At this point, you may continue adding extra files or directories to the local repository. Likewise, you can also remove files if you no longer want to check them in. In this case, we are happy to add the three directories, so we will leave them as is.
How to commit files to the SVN server
When you are happy with the state of all the files in your local repository, you can commit the changes to upload them to the SVN repository stored on the ProjectHut server.
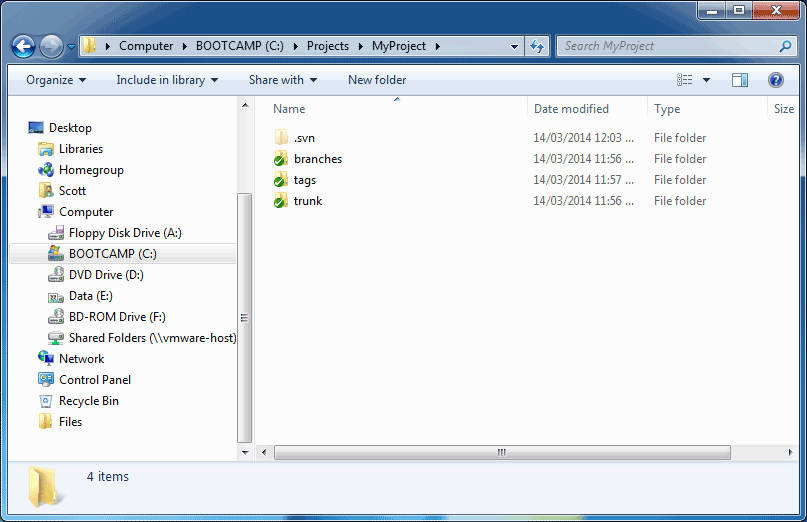
- Using Windows Explorer, navigate to the directory containing the checked-out project. You will notice that the folder now contains a red exclamation icon. This indicates that this directory, or one of the directories underneath, contains changes that have not yet been committed to the SVN repository.
- We will commit these changes now. Right-click on the project directory, and select
SVN Commit... 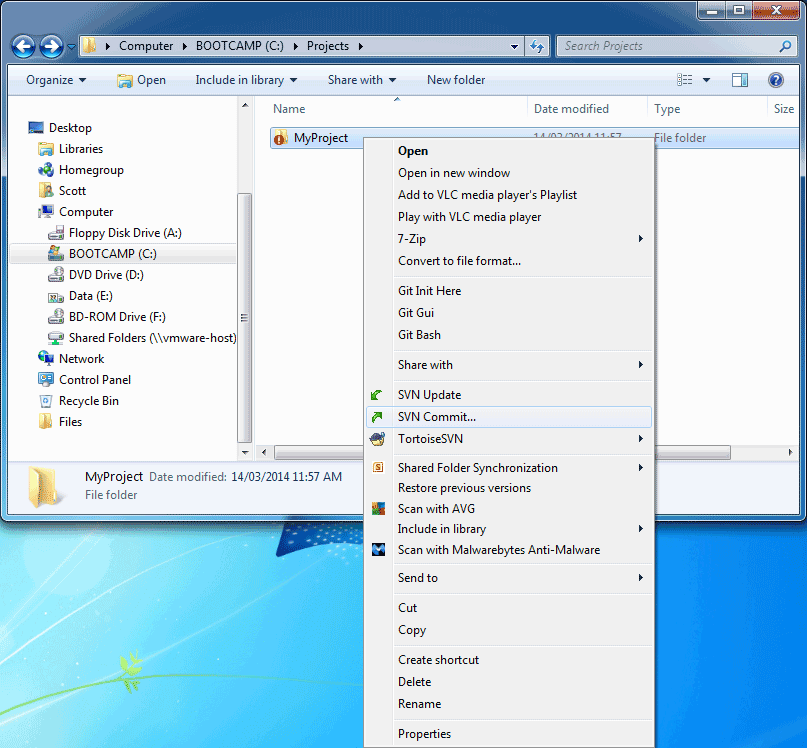
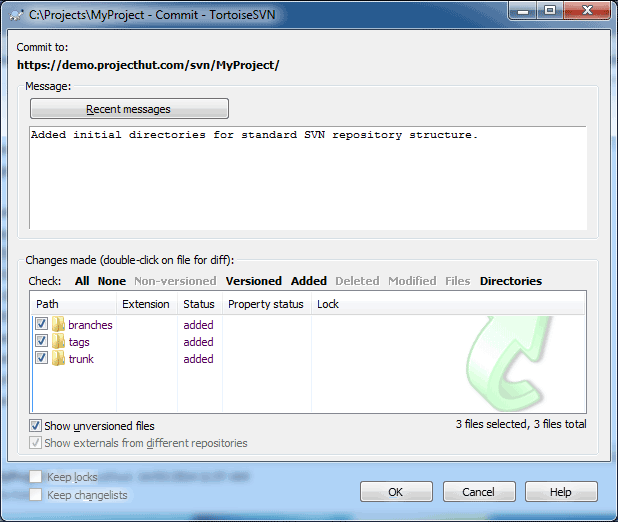
- The TortoiseSVN Commit dialog will appear. In the large text-box, make sure to enter a detailed description of the commit, for example what has been added or changed. It is generally a good idea to always write meaningful log messages here to help other users (or yourself in the future) understand the contents of the commit, and why it was made. Here you also have a last opportunity to review the files being added, remove or updated and use the checkboxes to make changes. When you are happy with the commit, click OK.
- Wait a few moments while the commit operation is performed and the data is uploaded to the server. During this time, a dialog will appear to keep you informed of the status of the commit. When it has finished, click OK to dismiss the dialog.
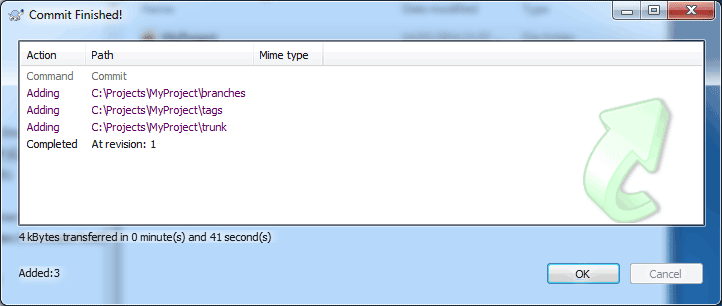
- You will now notice that the three new directories have been successfully added. The green check icon on each indicates that the changes have been committed to the server.
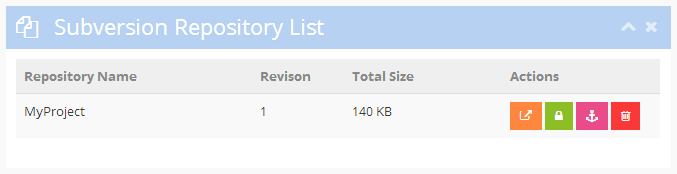
- Using the ProjectHut Control Panel you can also confirm that a new revision has been committed to the server. Navigate to the Subversion repository list, and you will notice that the Revision number has been incremented to 1. Each new commit will result in this revision number being incremented.
That’s essentially all there is to start using TortoiseSVN to commit files to your ProjectHut SVN repository!